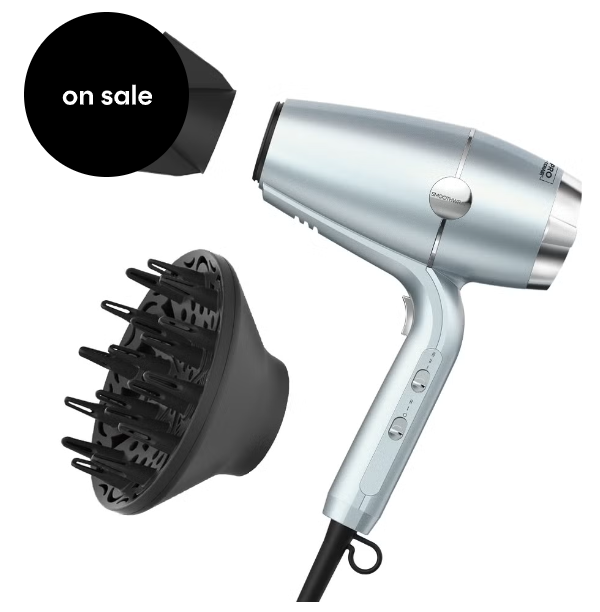
Hair Dryer And Straightener
Using a hair dryer and straightener together can help you achieve sleek, smooth, and straight hair. Each tool plays a different role in the process of creating a polished look. Here’s a guide on how to use both effectively, along with tips on choosing the right tools for your hair type and minimizing damage.
Why Use a Hair Dryer and Straightener Together?
- Pre-Dry Your Hair: A hair dryer helps remove excess moisture from your hair before you straighten it. Straightening damp hair can cause damage, so drying is essential.
- Smooths and Preps Hair: Blow-drying with the right technique smooths out your hair and makes straightening easier, reducing the number of passes you need with a flat iron.
- Creates Volume: Blow-drying with a round brush adds volume and lift at the roots before you straighten your hair, preventing it from looking flat.
Step-by-Step Guide: How to Use a Hair Dryer and Straightener Together
Step 1: Wash and Condition Your Hair
- Start with clean, freshly washed hair. Use a moisturizing shampoo and conditioner, especially if you plan to straighten your hair regularly, as this helps prevent dryness and heat damage.
Step 2: Apply Heat Protectant
- Always apply a heat protectant spray or serum to your damp hair before using heat tools. This shields your hair from heat damage and keeps it shiny and healthy.
Step 3: Blow-Dry Your Hair
- Section Your Hair: Divide your hair into sections (about 4-6) using clips. This ensures that each section dries evenly and makes it easier to manage.
- Use a Round Brush or Paddle Brush:
- For smooth, voluminous results, use a round brush if you want some volume.
- For a sleeker, straighter finish, use a paddle brush.
- Dry from Root to Tip: Direct the hair dryer’s nozzle down the hair shaft to close the cuticle, reducing frizz and adding shine.
- Keep the hair dryer on medium heat to avoid over-drying or damaging the hair.
- If you have thick hair, use a higher heat setting, but always maintain distance between the dryer and your hair.
- Cool Shot: Once each section is dry, hit it with the cool shot setting on your dryer. This sets the hair and adds shine.
Step 4: Straighten Your Hair
- Choose the Right Straightener: Opt for a flat iron with ceramic, tourmaline, or titanium plates, depending on your hair type (more on this below).
- Work in Sections: Start with small sections of hair. The smaller the section, the more control you have, and the fewer times you’ll need to go over each strand.
- Adjust Heat Settings:
- Fine or damaged hair: Use a low to medium setting (300°F–350°F).
- Normal hair: Opt for a medium setting (350°F–400°F).
- Thick or coarse hair: Use a high setting (400°F–450°F).
- Smooth with One Pass: Glide the straightener from the root to the tip in one smooth motion. Avoid going over the same section multiple times to reduce the risk of heat damage.
- Angle the Straightener: For a sleek finish, hold the flat iron at a slight angle when straightening near the roots, ensuring it lifts the hair for more volume.
Step 5: Finish with a Serum or Spray
- After straightening, apply a finishing serum or anti-frizz spray to add shine and protect your style from humidity. Look for products with ingredients like argan oil or silicone to smooth the hair cuticle.
- Choosing the Right Hair Dryer and Straightener for Your Hair Type
Hair Dryer
- Fine or Thin Hair:
- Choose a hair dryer with ceramic technology. It provides gentle, consistent heat that won’t over-dry fine hair.
- Wattage: Around 1200–1500 watts for controlled heat.
Thick or Coarse Hair:
- Go for a dryer with tourmaline or ionic technology, which helps dry hair faster and reduces frizz.
- Wattage: 1800–2000 watts or higher to speed up the drying process.
- Curly or Textured Hair:
- Opt for a dryer with diffuser attachments to keep your natural curl pattern intact while blow-drying.
Hair Straightener
- Fine or Thin Hair:
- Use a ceramic flat iron with adjustable heat settings to avoid high temperatures. Ceramic provides even heat, which is gentler on fine strands.
- Temperature: 300°F–350°F.
- Thick or Coarse Hair:
- A titanium or tourmaline straightener is best for thick, curly, or coarse hair. Titanium heats up quickly and maintains a consistent temperature, while tourmaline helps fight frizz.
- Temperature: 400°F–450°F.
- Damaged or Colored Hair:
- A ceramic or tourmaline straightener is ideal for minimizing heat damage while still delivering smooth results.
- Temperature: Keep it under 350°F.
Tips to Minimize Heat Damage
- Use a Heat Protectant: Always apply a heat protectant before blow-drying or straightening to shield your hair from high temperatures.
- Keep Heat Low: Use the lowest heat setting possible that will still get the job done for your hair type.
- Limit Heat Exposure: Don’t blow-dry and straighten your hair every day. Give your hair time to recover between heat styling sessions.
- Hydrate and Nourish: Use deep conditioning treatments or hair masks regularly to maintain moisture and strength in your hair, especially if you straighten often.
Conclusion
Using a hair dryer and straightener together can help you achieve sleek, smooth hair with volume and shine. Make sure to blow-dry your hair thoroughly first to remove moisture and smooth out frizz. Choose tools suited to your hair type and always use heat protectant products to maintain healthy, damage-free hair.


